A clean vape doesn’t just look good—it performs better too! Whether you’re a seasoned vaper or just starting, keeping your device clean is key to an enjoyable vaping experience. Residue build-up can impact performance, flavor, and even the longevity of your equipment. The best part? Learning how to clean your vape is simple and doesn’t take much time. This guide will help you Clean Your Vape quickly and effectively, so you can enjoy every puff to the fullest.
Why You Should Clean Your Vape
Before we jump into the steps, let’s talk about why maintaining a clean vape is so important. A dirty vape can lead to poor flavor, clogged airflow, and even permanent damage to your device. Plus, who doesn’t love the taste of fresh, flavorful e-liquid? Regularly Cleaning Your Vape ensures that it always operates at its best.
Some standout benefits of maintaining cleanliness include:
- Enhanced flavor: A clean vape means no leftover gunk dulling the flavors of your e-liquid.
- Reliable performance: Smooth draws and consistent operation are easier to achieve when you Clean Your Vape regularly.
- Extended lifespan: Taking care of your vape prolongs its life, saving you money on replacement parts.
- Better safety: Residue build-up can harbor irritants and bacteria. A clean vape minimizes these risks.
Maintaining your device doesn’t have to feel like a chore. When you Clean Your Vape, you’re investing in better vaping sessions and longer-lasting equipment.
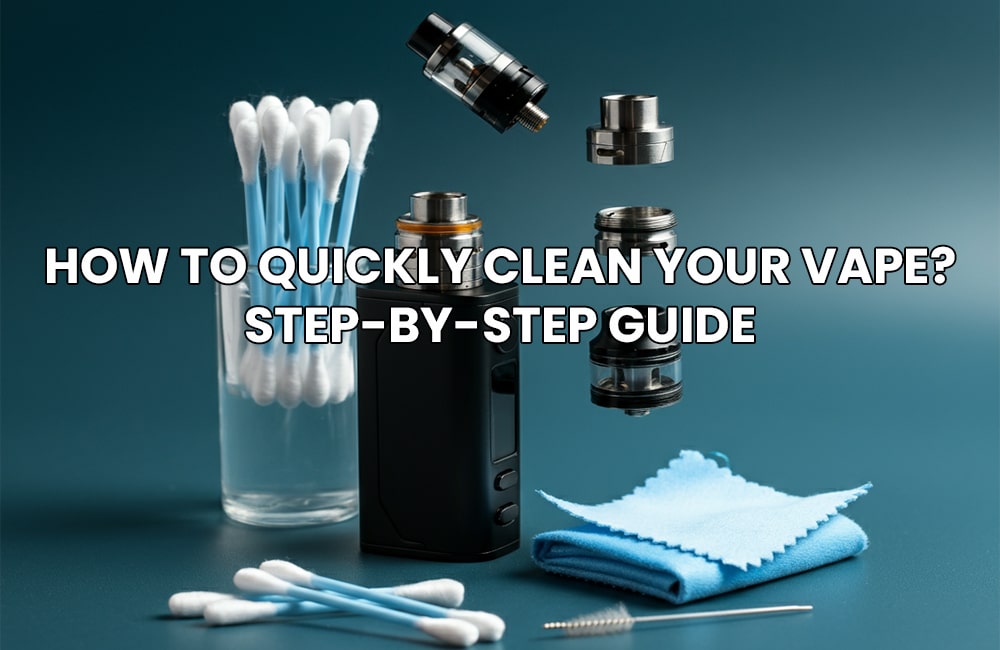
What You’ll Need to Clean Your Vape
Gather these simple tools to make the cleaning process quick and hassle-free:
- Warm water
- Dish soap (optional, for thorough cleaning)
- A microfiber cloth or paper towels
- Cotton swabs or Q-tips
- A small brush (like an old toothbrush)
- Isopropyl alcohol (for stubborn residue)
Once you’ve got everything ready, it’s time to Clean Your Vape step by step.
Step 1: Disassemble Your Vape
The first step to cleaning your vape properly is to take it apart. Be sure to power off the device and separate components like the tank, coil, and mouthpiece. Removing these pieces allows you to clean each part thoroughly without risking damage to the electronic components.
Step 2: Empty and Rinse the Tank
Start by pouring out any leftover e-liquid from the tank. Then, get rid of any leftover residue by rinsing the tank under warm water. If your tank has build-up, mix a drop of dish soap into the warm water and give it a gentle scrub. Use your brush or a cotton swab to get into tight spaces.
After washing, rinse the tank thoroughly with water to remove any soap residue. Pat it dry with a clean paper towel or microfiber cloth. Keeping the tank clean is an essential part of regular vape maintenance.
Step 3: Clean or Replace the Coil
The coil is where the device works its magic, so it’s extra important to keep it clean. If your coil is reusable, use a cotton swab dipped in isopropyl alcohol to wipe away gunk or burnt residue. Allow the coil plenty of time to dry before using it again.
However, if your coil is burnt or worn out, replacing it is the best move. Cleaning your vape with a fresh coil ensures top-notch performance and better flavor every time.
Step 4: Scrub the Mouthpiece
The mouthpiece can build up oils, residues, and grime over time—yuck! To clean it, rinse it under warm water and scrub it gently with your brush. For an even deeper clean, soak the mouthpiece in warm, soapy water for 10 minutes. Rinse and dry it thoroughly before reassembling your vape.
A clean mouthpiece provides a better inhaling experience, so don’t skip this step when you Clean Your Vape.
Step 5: Clean the Battery Housing and Connections
Check the battery housing and connections for any grime or residue. Use a cotton swab to gently clean these areas without soaking them. If the residue is stubborn, you can dampen the swab with isopropyl alcohol. Keep these parts dry to avoid electrical issues.
Maintaining clean connections will ensure that your vape stays reliable and performs well every time you use it.
Step 6: Reassemble and Test
Once each part of your vape is clean and completely dry, carefully reassemble the device. Reattach the tank, coil, and mouthpiece to ensure everything is aligned. Before refilling the tank with e-liquid, double-check for any remaining moisture near electric components.
Taking these steps every time you Clean Your Vape not only protects the device but also maximizes your vaping experience.
Bonus Tips for Easy Vape Maintenance
Cleaning doesn’t have to feel like a chore if you build it into your routine. Here are a few extra tips to help you maintain a clean vape:
- Rinse the tank when changing flavors to avoid residue and mixing.
- Replace coils when they start to taste burnt or look worn.
- Wipe the exterior of your vape regularly with a microfiber cloth to keep it smudge-free.
- Store your vape upright to avoid leaks or spills.
These small habits make it easier to clean your Vape and keep it working perfectly for the long haul.